Friday, July 6, 2012

Man T-shirt to WOW-man shirt


YAY!!!  We did it!
                A couple of weeks ago I happened to stumble across this blog HERE.  And I LOVED the shirt that she made so much and it looked so simple; I decided that I was going to try to make one … or five!  There was no way that I was going to try this without my Mom's help.  This was our very first attempt and will be making another one for sure.  We had no pattern or anything, all we had were the four pictures from the blog.  We are so awesome.  Actually my Mom is so awesome- she was the brains behind the operation.

What we were shooting for.
What we came up with.


Ok, we started with a white man’s t-shirt- seriously, we did.  


I started out by cutting a V-neck shaped hole into the t-shirt. (Be aware that you are going to need to hem it, so cut accordingly.)  Be sure to find where center is BEFORE you cut the V shape.  Just a hint.

We learned that this neck hole was too wide.  Cut as close as possible to the hem around the neck.
It should look more like this.

Then I removed both sleeves.  Now my man’s t-shirt looked like this.


Next, we used a loose straight stitch to create the ruffle effect at the top of the sleeves.  Then we pinned the ruffled sleeve to the shirt again.  (Be sure to pin the outside of the sleeve to the outside of the shirt.)  After we finished pinning I sewed the sleeve to the shirt.  Only after the sleeve has been sewn to the shirt and hemmed do you sew the bottom of the sleeve together.

Notice the hole- that is OKAY.  You want that.
Pull the left over thread to ruffle the sleeve.


              Once I had both sleeves attached to the shirt again, it was time to add the gathering under the bust.  (You will need an elastic piece that is 8” long and ¾” wide.)  I put the shirt on and my Mom marked a dot, with a fabric pencil, where I wanted the gathering to be.  I choose to leave plenty of room in the bust area because my bust size changes while I am nursing. This is how to decide where to gather and how to gather.

First, you need to find center, which is the same center you found for the V neck.  Then mark on your center line where you would like the gathering to be.  Once center is marked, decide how “gathered” you would like it to be and mark that on both sides.  Flip your shirt inside out and pin the center of your elastic to the center dot.  Put a second and third pin about a ½” from the ends of the elastic and pin it to the other two dots you have marked.  (This will leave you about a ½” of elastic to hold onto while sewing.)  Now, using a straight stitch, start at the first pin on one end of the elastic and sew over the center pin to the pin on the other side.   BE SURE TO STRETCH THE ELASTIC AS YOU SEW BUT DO NOT STRETCH THE FABRIC.  And viola, you have gathering under your bust.


Finished gathering under the bust will look like this.
 
You may have been worrying about the massive holes under the sleeves- do not fear that will be taken care of right now.  My mom had me put on my shirt and she pinned along both of my sides.  There was quite a bit of excess material there, which we cut off about a ½” from the pins.  (Be sure to cut on the correct side of the pins!)  Then we pulled all the pins out and flipped the shirt inside out again and re-pinned the sides together.   I then sewed up both sides.
Ruffle time!!  Ok, this is where it gets fun because you can do whatever you want!  I chose to do two double ruffles and one single ruffle.  For the two double ruffles I cut two pieces of material to the same length and width.  Again, you will need to use a loose straight stitch, down the middle of the strip of material to create a ruffled look.  (I will have to get back to you with a video on how to make a ruffle.)  And if you don't want ruffles you can do flowers, beads, whatever, or nothing at all if that is what you like.  Once you have finished the ruffles or flowers or whatever you are done!  Pat yourself on the back because you just made your own shirt.

All done!!
This is the second time around- I think I am getting better.
I learned that I like looser ruffles.

Wednesday, June 27, 2012

The Tale of Two Haircuts

                Lately, I have noticed that AJ’s sideburns and cowlicks get, like, extremely bushy.  And no amount of water or gel can contain them if they get too long.  About a week ago AJ decided to trim his sideburns while he was shaving, and he did a great job, but his cowlicks were still out of control.  So, this morning, we made time to give him a full on haircut because it was way past time.
                You may not know, but in salons they have “client cards” which are cards that tell the stylist everything they need to know about the clients’ hair.  Such as information on how much hair was cut off and which cut was performed; as well as, client preferences, colors/ lighteners, perms, processing times and so on.  I really, really need to make a “client card” for AJ because neither he nor I ever remember what length he likes.  It always goes something like this:
Me: “Honey, what length do you like for your sides again?” 
AJ: “I don’t know you are the stylist.”
Me: “I know I am, but I can’t remember everyone’s preference on their hair length.  I seriously need to make a client card for you.  How does a ¼” sound?  Does that sound right?” 
AJ: “Ummm … yeah.  Sure.” 
Me: “Ok.  Here we go.” 
A few minutes later … 
Me: “Well, a ¼” wasn’t right.  It must be a ½” that we always do.  Oh well, too late now.”
                Isn’t that the silliest thing ever?  And I could fix it SO easily, all I have to do is write it down, but I always forget.  It is highly possible that AJ’s haircut ended up shorter than it was supposed to be ... again.  (Maybe this post will help me remember which guard to use the next time that I cut AJ’s hair.)
                While I had my clippers and cape out, and I was covered in hair, I figured I might as well cut Samuel’s hair as well.   I sat him up on a box, on the chair, and I cut his hair all down to a ½”.  And if he didn’t have a CRAZY cowlick too I could have stopped there, but alas he has a strong cowlick, just like his Daddy’s.  On the back of his neck, all of the hair on the right side grows toward the left side- no joke.  So when his hair is long it looks like he has a mullet on his left side instead of the center.  Nasty, right?  Yeah.  Well, I was working on trimming off his mullet when Samuel shook his head and buzz!  A big chuck of hair was buzzed clean off the right side of the back of his head.  I couldn’t believe it- it looked horrible.  In order to fix it, this was the haircut Samuel got instead because it would have been too difficult to blend the sides with this kid.

The 1/2" cut.
Nice short length for summer, right?


Apparently, it wasn't short enough for Samuel- 1/8" cut.

Friday, June 22, 2012

*Once Upon a Banana


                Once upon a time, there was a girl named Emily.  And this girl LOVED banana bread- so, she made it all the time.  She liked to experiment and try new banana bread recipes, but she soon noticed that some were yummier than others.  Some were too dry, and others lacked the "banana" taste that is required in banana bread.  As time passed, she made banana bread less and less often; until she didn’t make it at all.  One day, many years later, she was buying bananas from Wal-Mart with her two children and she thought, “I want to make some banana bread with these bananas!”  To Emily’s horror she realized that she didn’t remember how to make banana bread anymore.  *Gasp!!* 
                This was a serious dilemma, and it was keeping Emily from a nice warm slice of banana bread.  But she couldn’t just Google up any old recipe.  Because she knew, not all banana breads are made equal.  All too soon, there were only two bananas left.  Emily needed to find a good recipe and quick!!  Then one fateful day, she was blog stalking people she knew and happened to stumble across a banana bread recipe- it was meant to be.  This must be the recipe she was looking for … and as it turns out, it was exactly what she had been looking for.  Soon, she was sharing the magic of banana bread with her children.  The End.

*This tale was inspired by actual events.

One Banana Banana Bread
1 Large Very Ripe Banana (or two small ones)
1 Egg with enough milk to make 1 cup liquid
1 Stick butter (softened) (1 stick = 1/2 cup)
1 tsp. Vanilla
1 ½  cup Flour
1 cup Sugar
1 tsp. Baking Soda
Nuts (Optional, but seriously ... you need them.)
Combine all ingredients in a large bowl (you don’t need to sift or mix anything beforehand). Set mixer on slow or medium speed, and mix until lumps are pretty well gone (not too long or bread will be too firm).  Spray bread pans with oil (do not flour).  Then fill pans 2/3 full.
Bake for 55 Minutes at 350 degrees or until golden brown. Test with toothpick for done-ness. This bread comes out quite moist with quite a lot of banana flavor- with only one banana!  (Did you read that?!  Did you read what it said?!  It is NOT lying to you- it is moist and tastes of banana.  Perfect!)
You can use this same recipe to make itty bitty, kid-sized teacakes (bake time is about 15-18 minutes at 350 degrees), cupcakes, small loaves, etc.  (I baked them for 20 mins. and they turned out awesome.)
The baked loaves can also be wrapped up in foil and frozen. Just pull one out, defrost it, unwrap and reheat in paper towel in the microwave until warm.
We are going to try this out.
Everything you will need minus the baking soda.  It didn't make it into the picture, but it did go into the bread!


The finished product.


Samuel ate, like, three of them!

Wednesday, June 20, 2012

How to: Sweet and Sour Chicken


                I found this recipe forever ago, and I have tweaked it to make it totally awesome!!  And I have been meaning to share it with you all for quite a while.  PS: You will want to try this, trust me, because I have NEVER ever liked sweet and sour sauce before.  This is a life changing recipe.  Seriously.  So, without further ado, I give you … The BEST Sweet and Sour Chicken- from scratch.
                WAIT!!  Don’t leave.  You can’t give up before you have even read the recipe.  I almost did the exact same thing when I found the original recipe.  Just remember- this can change your life, for the better.


The chicken:
                Ok, if you really want to go all out, here is an easy and super yummy way to fry your own chicken for this recipe.  If you want to get seriously crazy, like pioneer crazy, and butcher your own chicken … crazy!  I applaud you, and I could post a how-to-video if anyone would like.  Unfortunately, I am not pioneer crazy, so I buy fresh chicken breasts at Wal-Mart.  I usually always batter and fry my own chicken, but when I am lazy or Lily is crying at me or I don’t have a lot of time, I just warm up some Tyson’s chicken.  It still tastes great, and it’s quick, which is a plus.  But to fry your own chicken you will need the following:

3 whole boneless skinless chicken breasts (cut into 1” cubes)
Flour ( I like to mix a little wheat flour into my white flour)
4 egg yolks
2 tbsp. soy sauce
1/2 tsp. water
Oil for frying

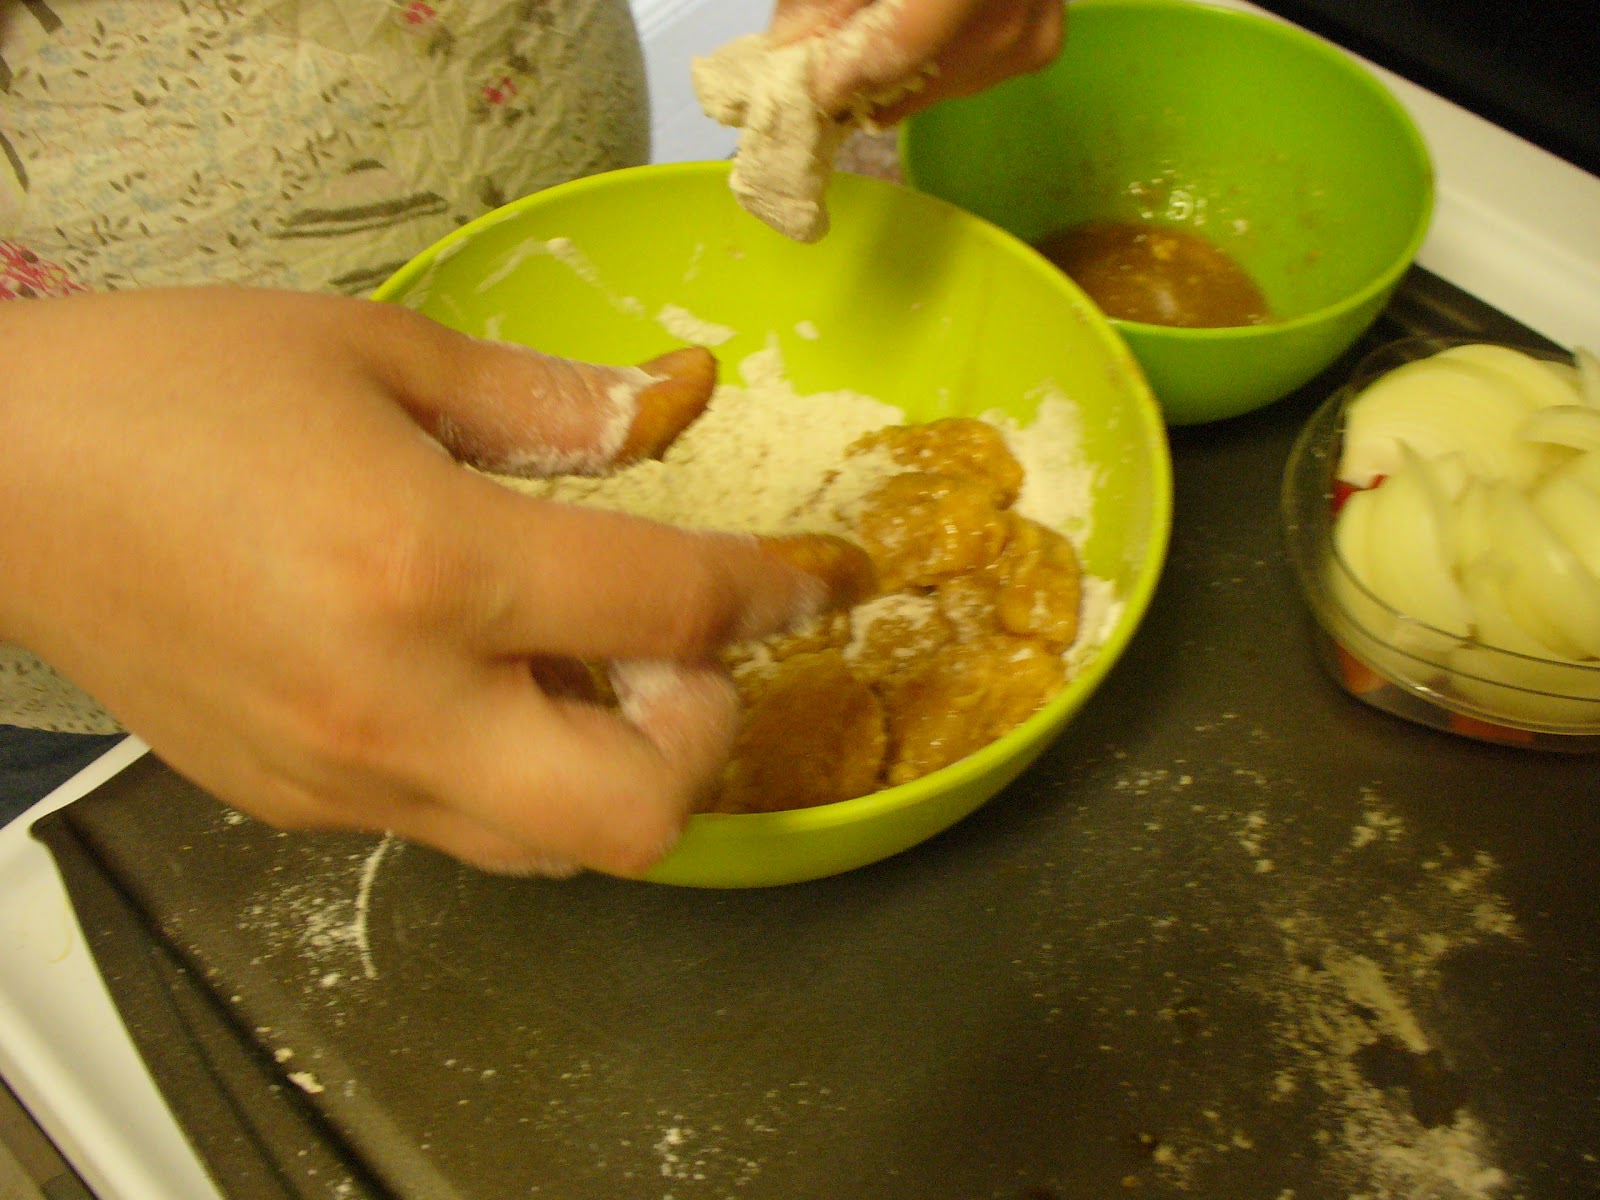
Mix the egg yolks, soy sauce and water.  First, roll the chicken pieces in the flour, then coat them in the egg mixture, and then roll them in the flour again.  Deep fry the battered chicken in batches for 2-3 minutes, and drain on paper towels.  (If needed, make additional egg mixture by halving/ doubling the above amounts ... etc.)

Me battering the chicken pieces.
AJ frying them.
Beautiful, right?!  And SO easy too.

The sauce:
1/3 cup vinegar
1/3 cup sugar
1/2 tsp. salt
1/4 cup orange juice
1/4 cup pineapple juice
1/4 cup ketchup
2 tbsp. cornstarch
(The amount of vinegar can be adjusted from 1/4 cup to 1/2 cup depending on how "sour" you want it.)
Pineapple
Onion (cut into 1” pieces)
Bell pepper (cut into 1” pieces)
Tomatoes (cut into 1” pieces)

To make the sweet and sour sauce mix: vinegar, sugar, salt, orange juice, pineapple juice, and ketchup in a medium sauce pan.  Bring to a boil and let boil for about 3 to 5 minutes.  (The amount of time doesn’t really matter as long as all the ingredients are thoroughly mixed and the sugar is dissolved.)  While the sauce is boiling mix 2 tbsp. of cornstarch into 1/4 cup juice, either orange or pineapple or a little of both, I use pineapple.  After the sauce is done boiling turn off the heat.  Add the cornstarch mixture to the sauce and stir in until thickened.

If you want chunks of pineapple or tomato, now would be the time to add them to the sauce.  (I don’t really like tomatoes, so I only put in pineapple.)  Add your pineapple and tomato to the sauce and heat thoroughly.  Sauté the onions and bell pepper in a separate pan.  If you desire you can add them to the sauce as well or serve them on the side.

Gently pour your finished sweet and sour sauce over your chicken and serve with white rice.  Be sure to eat immediately. Bon appetite!!  (This recipe serves approximately 4 adults.)
Yummy, yummy, yummy!!